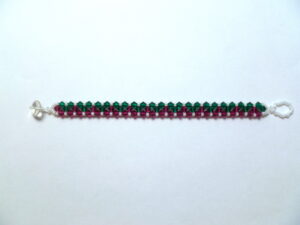
Need a last-minute gift? If you’re unsure what would be a good present to give, here is a tutorial for a red-and-green beaded bracelet, simple and easy for even beginners to make.
Materials:
- Beading thread
- Two beading needles
- Red 4mm bicone beads (R)
- Green 4mm bicone beads (G)
- Size 11 Toho seed beads (T)
- A button with a diameter of 1cm
- An extra bead (doesn’t matter what kind)
The red bicone beads will be referred to as “R,” the green bicone beads as “G,” and the seed beads as “T.”
Step-by-Step
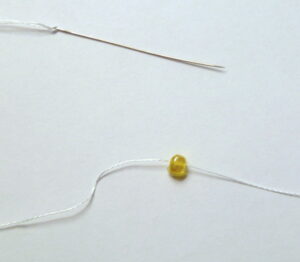
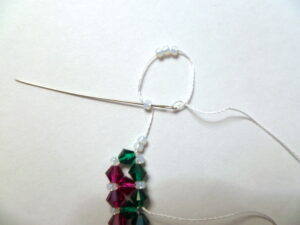
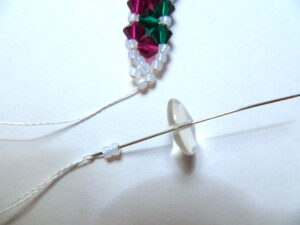
1. Cut 8 feet of thread. Pull one end of the thread through the eye of one needle. String the extra bead onto the needle and move it down the thread so that there is about 5 feet of thread between the bead and the needle.
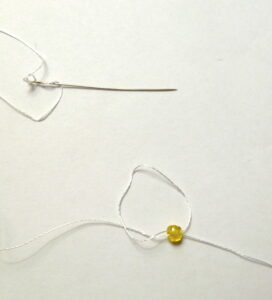
2. Pass the needle through the bead a second time so that a loop of thread is formed.
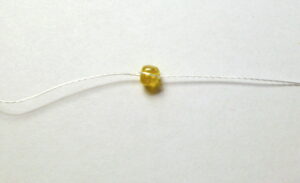
3. Tighten the thread until it fits snugly around the bead, like in the photo below. This will mark the spot on the thread that is 5 feet away from the needle.
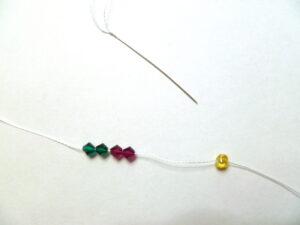
4. Add 2 R, then 2 G onto the thread. Move the 4 beads down the thread until they are near the extra bead.
5. Tighten the thread until the beads fit snugly against each other.
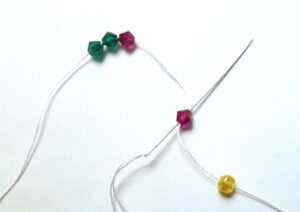
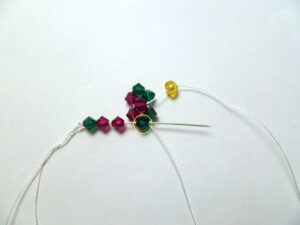
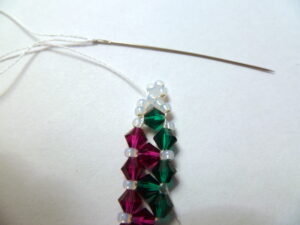
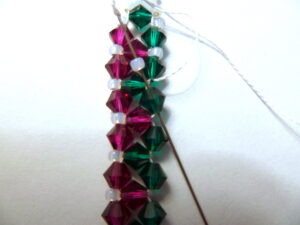
6. Add 1R and 2G onto the thread.
7. Pull the needle through the center R (marked with blue) so that a loop of beads is formed.
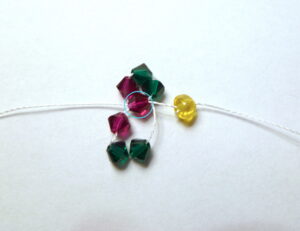
8. Tighten the thread until the beads fit snugly against each other, like in the photo above.
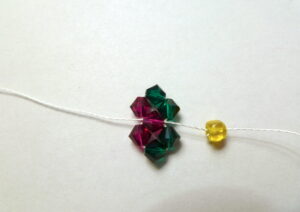
9. Pull the needle through the lower-left bead (marked in yellow) and the lower-center bead (marked in blue). The needle should exit from the lower center bead.
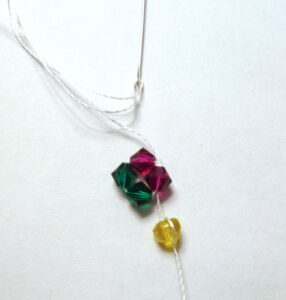
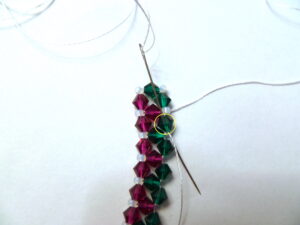
10. Add 1 G and 2 R onto the thread.
11. Pull the needle through the center G (marked with yellow) so that a loop of beads is formed.
12. Tighten the thread until the beads fit snugly against each other.
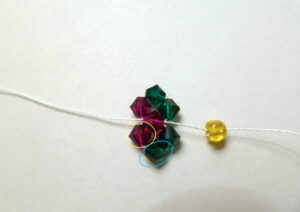
13/14. Pull the needle through the lower right bead (marked in yellow) and the lower center bead (marked in blue). The needle should exit from the lower center bead.
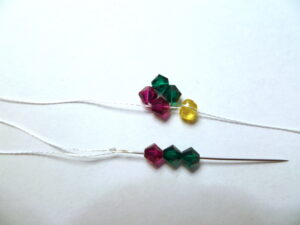
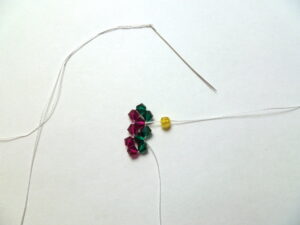
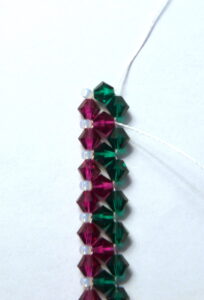
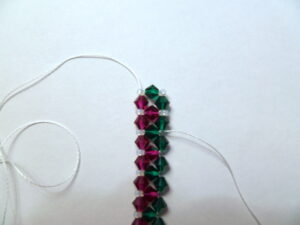
15. It should now look like this.
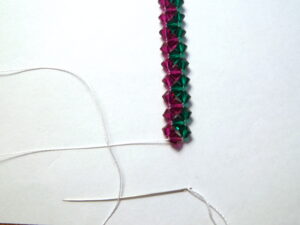
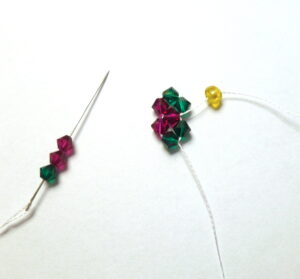
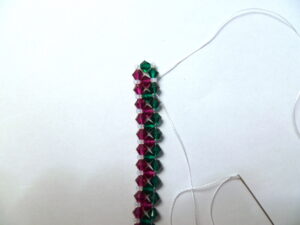
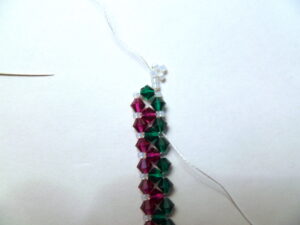
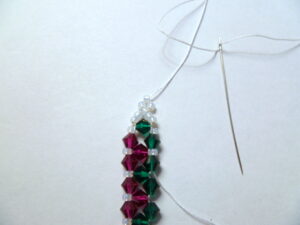
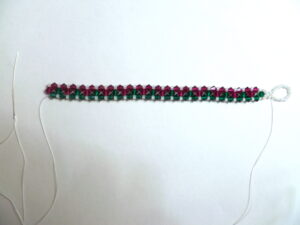
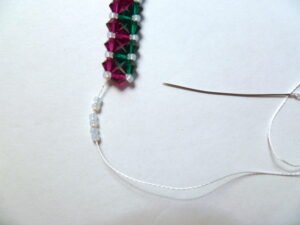
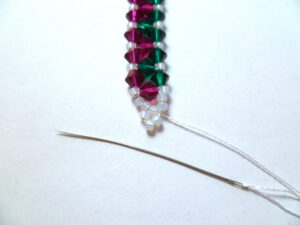
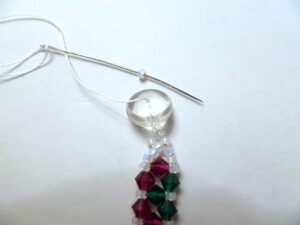
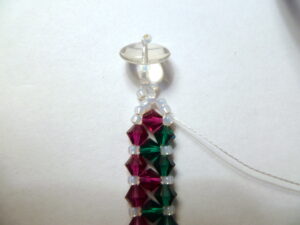
16. Repeat Steps 4-7 until you reach your desired length. If your wrist is 6 inches, it is recommended to make this portion of the bracelet at least 6 inches long. The bracelet should now look like the picture below.
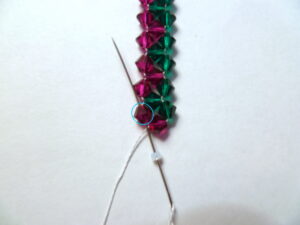
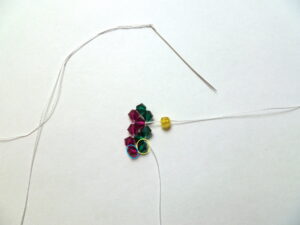
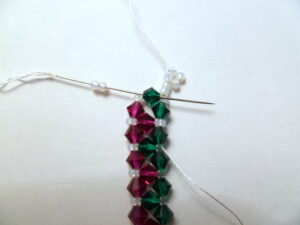
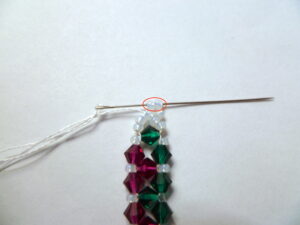
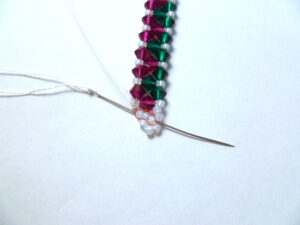
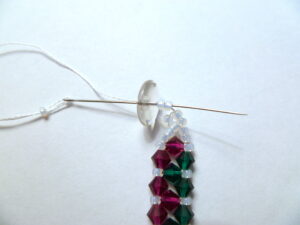
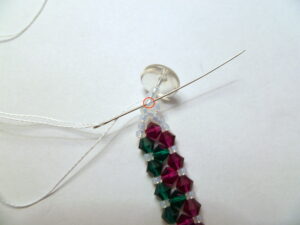
17. Add 1 T onto the needle and draw the needle through the upper left bead (marked in blue).
18. Pull the thread tight so that the T fits snugly in between two bicones.
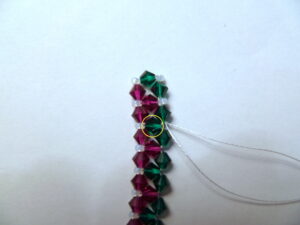
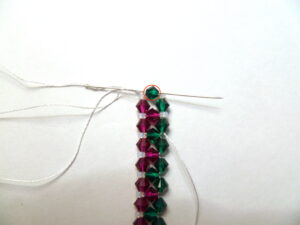
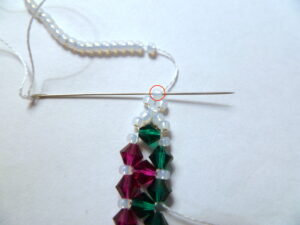
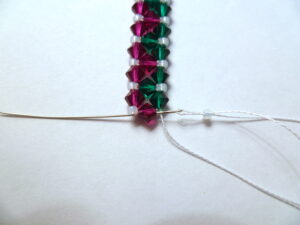
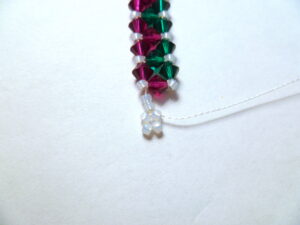
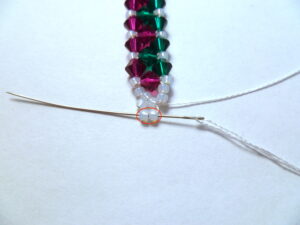
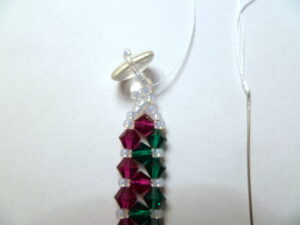
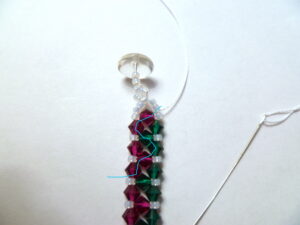
19. Add 1 T onto the needle and draw the needle through the center G bead (marked in red).
20. Tighten the thread so that it looks like the picture above
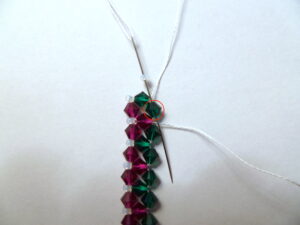
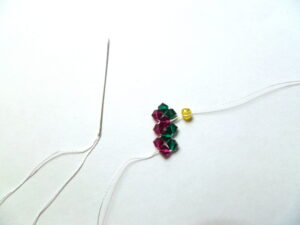
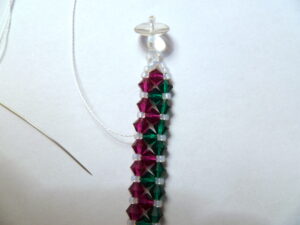
21. Remove the extra bead.
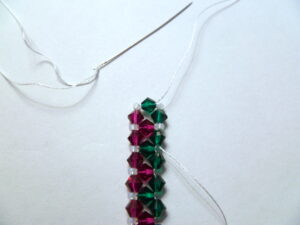
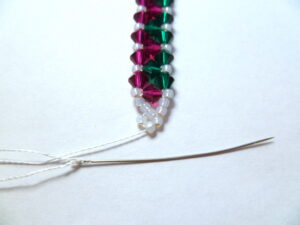
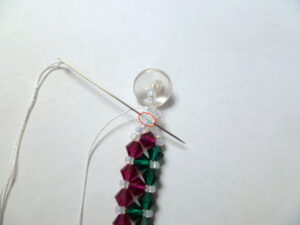
22. Add 1 T and pull the needle through the lower G bead (marked with red).
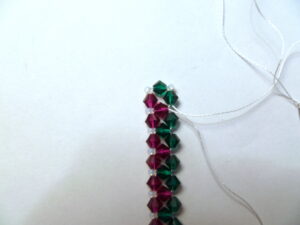
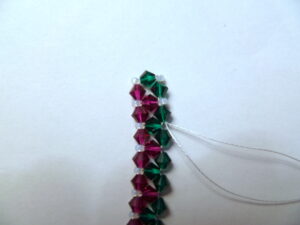
23. It should now look like this now.
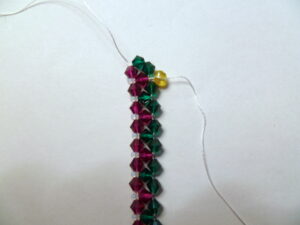
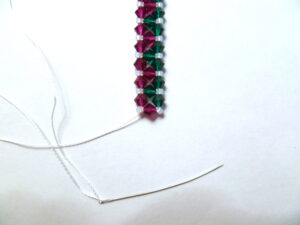
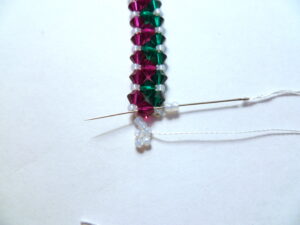
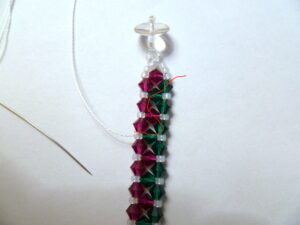
24. Now take the end of the thread which you have not previously used (the one without a needle) and thread a needle onto it. Pull this needle through the G marked in yellow
25. It should now look like this now.
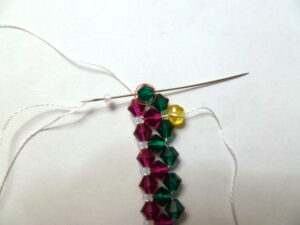
26. Take one of the needles (it doesn’t matter which) and pull it through the center G (marked in yellow).
27. Then pull the needle through the four beads circled in blue.

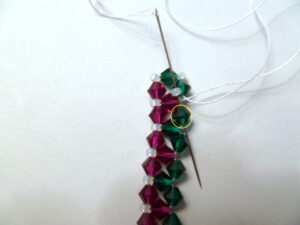
28. It should look like this now.
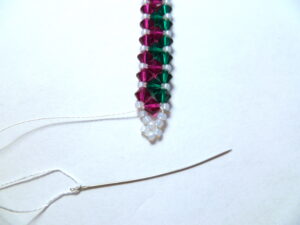
29. Pull the needle through the center G bead (marked with red).
30. It should now look like this now.
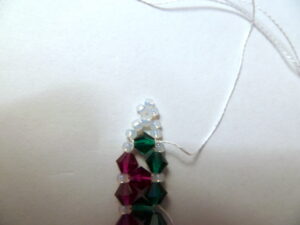
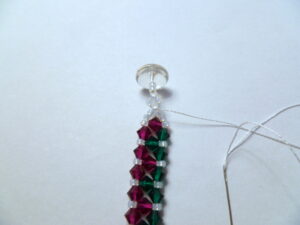
31. Add 6 T onto the needle
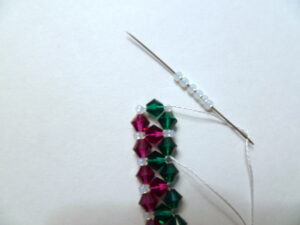
32. Cross the needle through the third T so that a loop of beads is formed.
33. It should now look like this.
34. Add 2 T onto the needle and pull the needle through the center G bead.
35. It should now look like this.
36. Pull the needle up through the 3 T marked in red in the picture below.

37. It should now look like this.
38. Then pull the needle through the 2 T marked in red in the picture below.
39. It should now look like this.
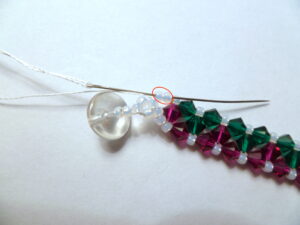
40. Add 19 T onto the needle and pull the needle through the T bead circled in red.
41. It should now look like the picture below. This is the closing loop that will serve as part of the bracelet closure.

42. Now leave that thread alone and take up the other needle. Add 1 T onto the needle and pull it through the G bead directly below.
43. Repeat Step 22 until you reach the other end of the bracelet. It should now look like this now.
44. Add 1 T onto the needle and pull the needle through the bottom R bead.
45. It should now look like this now.
46. Add 6 T onto the needle.
47. Pull the needle back through the third T bead so that a loop of beads is formed.

48. Tighten the thread so that it looks like the picture below.
49. Add 2 T onto the needle and pull the needle through the center R bead.
50. It should now look like this.
51. Pull the needle through the 3 T beads circled in red in the picture below.
52. It should now look like this.
53. Then pull the needle through the 2 T beads circled in red in the picture below.
54. It should now look like this now.
55. Add 2 T and the button onto the needle.
56. Move the 2T beads and button so that they lie tightly against the rest of the bracelet.
57. Add 1 T onto the needle.
58. Pull the needle straight down through the button and 2 T beads.
59. It should now look like this.
60. Cross the needle through the next T bead (marked in red) and pull the needle through.
61. It should now look like this.
62. Pull the needle down through the 2 T beads marked in red.
63. It should now look like this.
64. Weave the thread down through the R and G beads in the wave-like pattern traced in blue.
65. It should now look like this.
66. Weave the needle up through the R and G beads in the wave-like pattern traced in red.
67. Repeat Step 34. Snip the thread close to the bracelet (be careful not to cut into the threads holding up the rest of the bracelet). Repeat Steps 34-36 but with the other end of the thread.
Final product: